Well Saige turned 8 this week and as well always do around here we celebrate her bday in style! Saige wanted to share her favorite Pupcake recipe we try to make for every Bday now! It’s her favorite tradition . . . well next to her pearl wearing photo shoots!
These “Pupcakes” are made from a must follow blog of Pretty Little Past times
1 cup whole wheat flour (preferred) or white flour
1 teaspoon baking soda
We always use extra peanut butter: it is her birthday after all! But it makes great icing on top too.
{Boston Terrier Approved}
Preheat your oven to 350 degrees. In a mixing bowl, combine the egg, peanut butter, oil, vanilla, and honey. Blend well. Stir in the carrots and mix thoroughly. Sift flour and baking soda together and fold into batter.
Fill 6 lined cupcake molds 3/4 of the way full with the batter. Bake for 20 minutes (35-40 minutes if making one full cake) or until cooked through. Remove from the oven and let the pupcakes cool completely before frosting.
Once cooled, spread peanut butter over the tops of the pupcakes and top with remaining carrot shred “sprinkles”. Break a Beggin’ Strip in half and push one side firmly into the cake to keep in place. Add a Milk Bone treat in front of the strip and your pupcakes are ready to be served!
All of the holidays are about to be here and guests will be arriving soon. So you always want your home that you have been sooo working hard on all year ready to shine! I am pumped to finally show off our new laundry room. Yes. . . laundry room, not usually the no. 1 go to stop for a party, but after this reno we are ready to throw a party that it’s done!!!
If you remember what this awful excuse for a laundry room looked like, you would be jumping for joy too that it is now an actual room!
{ The dreaded before. . . }
I am not sure who thought this cheap room divider was making the cut but I personally thought it was not living up to its potential.
The main issue of course is not have a separate laundry room from the kitchen. So a simple wall and a little Boston design flare and “Wahlah” I feel like we have a whole new house!
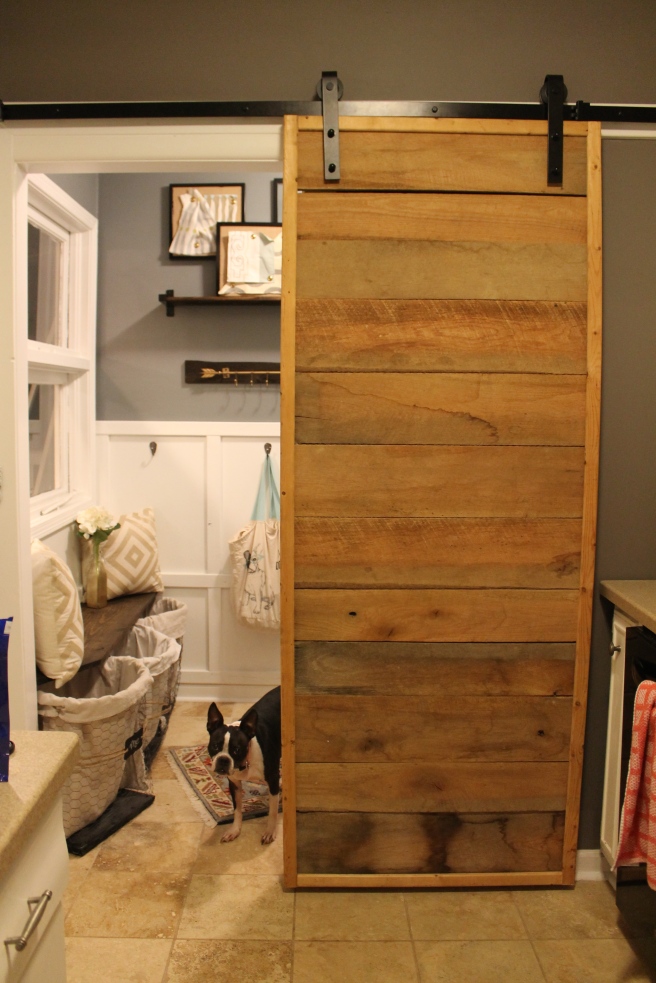
Check out the final product. . .
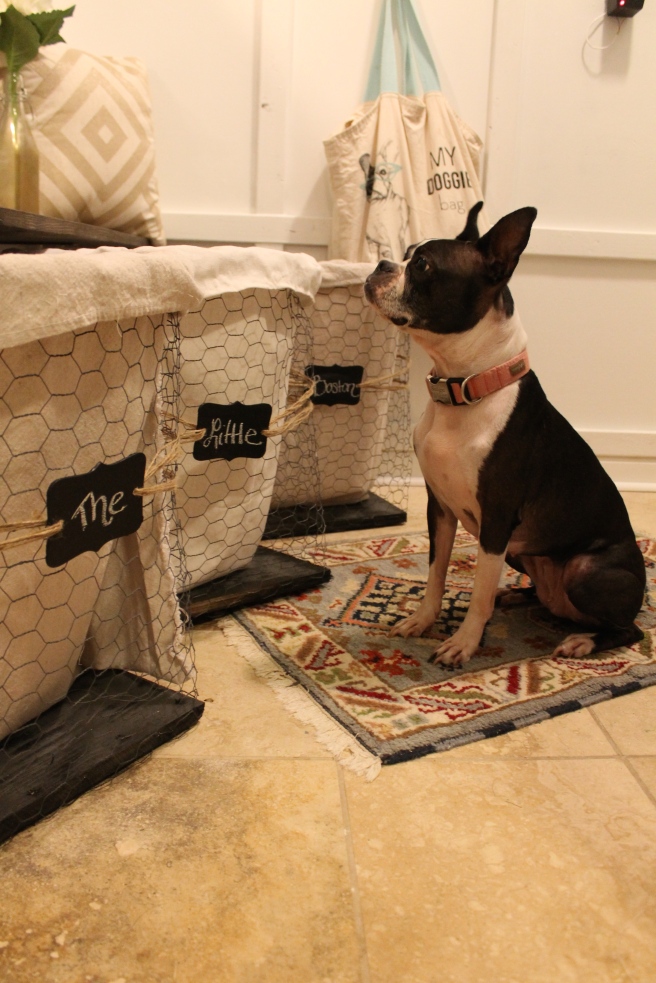
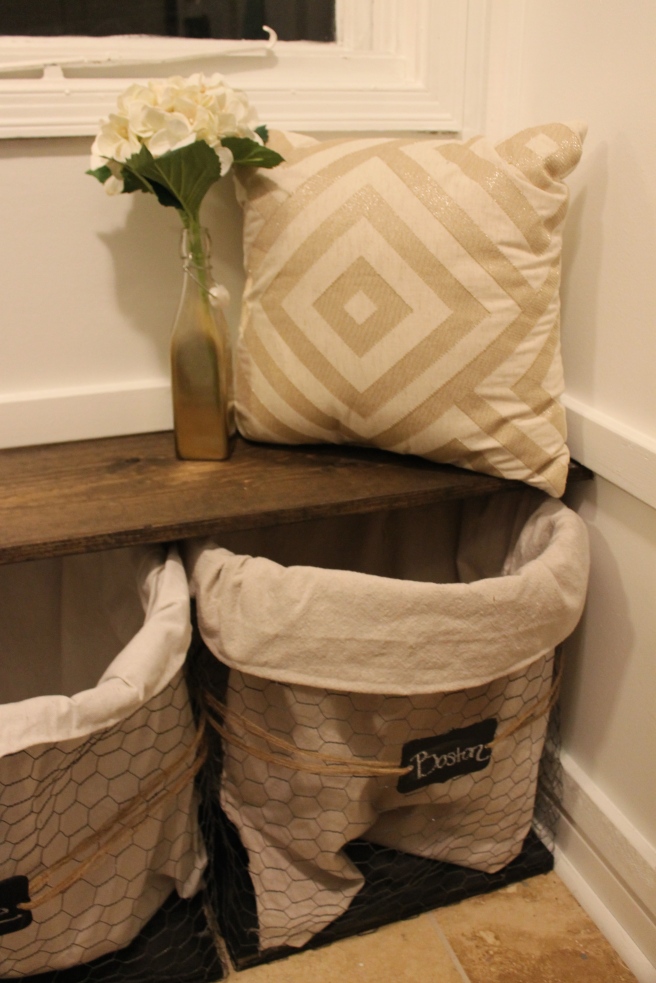
{ Happy dance because we’re finished!!! }{ Admiring our custom made laundry baskets }
{ Custom “art” from some TJ Maxx & Target finds }
Keepin it classy. . .
with some sleek back hardware
{ Keeping it classy with some sleek black hardware }
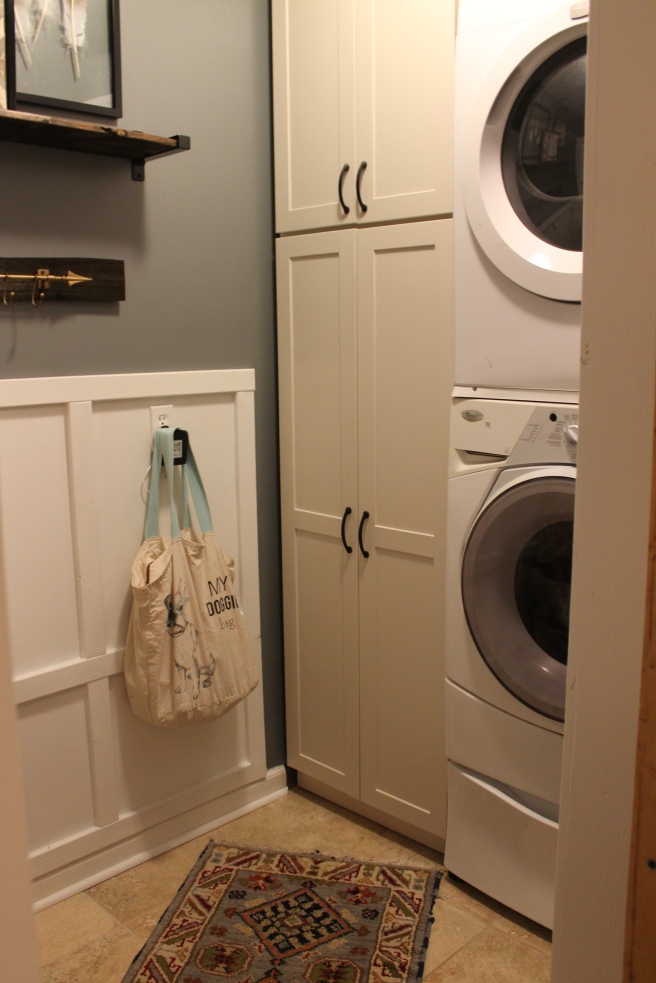
{ Best part is our whole new efficient layout with a custom painted storage cabinet & stacked washed & dryer }{ Cozy touches are a MUST in every room . . . even the laundry }{ My favorite touch is our custom barn door mom let me make with my own little paws }
The laundry room ended up so well. . . it made the kitchen look a lil boring. So naturally I had to paint that as well.
Don’t you love once you renovate one thing. . . it makes everything else look dull. A Boston’s work is never done so I will save that for another post.
But for now, I am no longer ashamed to have my puppy play dates over and show that I don’t have to wash my puppy bed while fixing my bowl of dog food in the same room. Makes me feel like we’re living in fur baby luxury!
It is officially fall! Helllllo October! I love what this time of year brings. . . especially this year as my mom’s sister is blessing us all with TWINS! My mom and I were so pumped { of course over the news we are going to be aunts } but also over the fact that we get to throw a party!!!
Let the gender reveal party planning begin!
The most important thing about a party is the theme: the mommy-to-be chose “Guns & Glitter” so this is our take on it:
{ First } Just add color
We needed a color scheme. Blue and Pink is too “expected” so we wanted to create a twist. Coral and Mint Green became the staple colors with a back drop of White & Gold.
{ keeping it classy }
{ Second } Décor Time
We play up the theme. The main decoration would be a banner with the theme and color scheme:
Hobby Lobby is always a staple for me in these events and I find the scapbooking paper to be perfect to create the back drops I need.
I chose shiny gold scrapbooking sticker letters in the LARGEST size they had to make the banner pop. I swapped up the font for the “guns” and the “glitter” to play up the theme a little more.
Each triangle pendant I made out of a 12×12 scapbooking paper.
I didn’t think the gold letters were enough on their own, so I created “frame” for them with some crumpled up tissue paper: and Wa-lah!
{ paw-made banner }
Next we added a softer touch with just strips of fabric. This is an easy DIY project that can add color to any party. I simply chose a yard of 4 different fabrics that created the color scheme and cut them in about 2″ wide strips. Then I just tied knots for days. . . my little paws were tired but Geez! that banner looked good!
To spread the color around, we made sure there was extra knotted fabric to be hung in different places. The more you can do the better because it will create a fuller look.
{Third } Sign me up!
Another key and inexpensive party decor component is Signage. The more the merrier as it creates a unified theme throughout the event. The best way to make it custom is to use a special font. Here are the ones I downloaded for {Free} to create the signs for this event.
{ Free Fonts! Compliments of the Shabby Chic Cottage }
I mostly used: Laser Metal and the signs turned out soo cute!
A touch to dress up the signs is to frame them. I usually just pull frames from my house and use them over and over.
Best place to use signage is on the food and beverage tables. This gives you an easy way to dress up the food and to play up the theme with cute names and colored drinks.
Also remember that the food and beverage table will be one of the biggest focal points at an event, so the serving pieces DO matter. I wanted a classy background so we went with all white with metal accents. This is also a great place to hang a banner, because everyone will usually look for the food or drinks once they first arrive.
{ Fourth } Gold Plated Event
We wanted gold everywhere. Spraypaint became a staple in this part and I spray painted everything gold that would sit still.
The main pieces created a |Dress your Guess Station|
{ Dress Your Guess }
Gold pearls and tiaras: if your guess was twin girls
Gold guns and sheriff badges: if your guess was a boy
I bought these pieces in bulk at the dollar and party store to make an inexpensive party focal point that all the guests could be interactive with.
{ All the guests had a blast dressing up }{The Grandmothers-to-be we all team Glitter}{My mom all decked out in team glitter}{ My little boy Boswer and his mom Katie even came and supported team guns }{ Of course I was Team Glitter All the Way }
I even spray painted gold clothes pins for guests to “pin” their guess on this beautiful display board.
{ Pappaw marking a pin for team guns }
I easily made this, by of course pulling this antique frame from my home. I made a back drop of left over painters drop cloth {looks like linen}. Then after a few custom font signs and colored scrapbook paper this puppy was ready to display.
A fun add on: My mom questioned her sister on some old wives tales and displayed them here as well to give guests a hint. . . Points to boys. . .I wonder if they were right???
{ Pin Your Guess }
{ Fifth } Photo Ops
Once everyone was able to place their guess, we did a whole party photo shoot!
{ Team Boys }{ Team Girls }
{ Sixth } Game Time
To get guests involved and create a memorable event we planned custom games. This also was another area for Signs! We couldn’t print the font large enough so I put my little paws to work by copying the main font with a gold paint pen onto foam signs.
“Who” la hoop {get it??}
{ Who-la Hoop }
2. Guess Who {a child hood favorite and perfect game for here}
{ Guess Who }
3. “Baby Shoes” {a custom take on horse shoes with sets of baby boy shoes connected and baby girl shoes connected}
{ Baby Shoes }
The guests were great sports and played them all!
{ Pre-Party Planning }
The parents-to-be are clearly loved a great deal and we found quite a few people were wanting to come to the gender reveal to celebrate them and their growing family. So space planning was a must in figuring out where to place all of the setting and games to make sure everyone had enough space but still felt apart of the entire event.
{ Saige is the name | Party Planning is the game }{ Scoping put the Venue }
{ Making Memories }
Lastly we created a “Custom Guest Book”. A questionnaire for each guest to fill out as a keepsake for the parents and their future babies! Just a little personal touch.
{Baby Guest Book Questionnaire}
Of course the best part was the surprise announcement: An extra large confetti and helium filled balloon acted as the reveal tool. We even tied it up with some knotted fabric!
And we joyfully found out they will be. . .
{ Glitter Time }
GIRLS!!!!
Oh I’m sooo excited and can’t wait for them to arrive! But for now, its time to plan a nursery. . . a Boston’s work is never done!
I have been super busy designing life and constructing our new laundry room. It’s almost done, but we are now at the point that we are picking paint colors! Ooh la la! One of the most important ones is the cabinet color. Since my mom looks at this stuff everyday I asked her to give a few tips on the colors and cabinet trends this year. . . Here are some of her top choices:
Top cabinet colors this year are definitely Gray & White. They go perfectly together and create a wonderful neutral backdrop
{ Rustic Modern | Looking Fabulous }{ Forget 50 Shades. . . This fabulous kitchen only needed 1 }
2. There is also the “All White Everything” color palate for the more-elegant minded
{ Oh so Timeless }
3. We also have the more edgy and bolder trends of color that are coming in hot this year: Navy Blue appears to be front runner and we are LOVING it!
{ Navy Done Right }{ Beauty cred to my mom’s company here | Twin Construction }
4. The next big trend is Going Green | Not just efficiency wise . . . but also the color palate.
{ Going Green }
Also if a non traditional color is too big of a commitment | Another favorite is lighter toned uppers and more dramatic bases or islands to create a 2-toned kitchen
{ Green with envy over these Mint cabinets }
*Side note | That beautiful mint kitchen comes from Sarah Sherman Samuel where she spills the delicious colors come from Farrow & Ball: Pigeon & Wimborne White
5. There there are also the { Oh So Daring } who choose to make a bigger statement with |deep | rich | dark | colors|
{ Contrast is Key }{ All Drama All Day }
6. There are also quite a few other trends we are loving using | Like. . . open shelving
{ Oh so cozy }
7. Or even no uppers at all for a more open look | Drawers with dividers are becoming a huge staple for dishes and glass storage to help create a functional kitchen with base cabinet only
{ So light & airy }
8. That brings us to number 7| dramatic appliances. Did you notice that {Fabulous} range in the trend before??? It’s none other than the La Cornue CornuFe Stove from Williams|Sonoma. The colors choices and style is to die for:
9. If you also love the gold accents on that amazing stove you will also love the new trend | Gold is making a come back! And we want it everywhere!!!
{ This is what dreams are made of }
10. Last but not least is one of the main finishes in your kitchen: Stone. A dreamy way to put your kitchen on display is to use an entire slab of stone not only as your countertop . . . but also as your backsplash
{ WoW factor }
I’ll be honest. . . that can get a bit pricey so another alternative is to play up the tile and to go with the trend |more is better| and of course ALL the way up to the ceiling is a yummy must
{ Tile for days }
I mean this kitchen has its all: All tiled up | Blue cabinets | Gold hardware | Open shelving | & oh there’s that range again. Perfect recipe for a dream kitchen
I hope these tips on trends have inspired you to think out of the box and try something new! I know it’s inspired me to choose something interesting for the new laundry. . . stay tuned to see what my little paws pick!
Our laundry room is still coming along. . . but in the mean time I wanted to share with you my room at our house that I think has added quite the special touch to our home. I am super excited to share this project, because our partner in crime, Sparkie, was a big help on this one. Also it makes our home Boston friendly.
{ Sparkie admiring our work }
You can see how disappointing the stairs looked before we got a hold of them. The half wall that was originally built was cumbersome and caused the room to look heavy and blocked off. Sooo it had to go. So this was the perfect time to tear it all out and make it something extraordinary: a custom built pup room!
{ Before. . . }
After a long day of stress relief on demo we had a fresh slate to start with and then it was time to come up with a game plan. We have found that with an old house. . . you are not sure what you will find, so it’s sometimes less disappointing to tear in and then make decisions.
Looking at what we had to work with, I wanted to make the stairs extend all the way to the right. . . more traction for running up and down stairs chasing tennis balls ya know! So that means we had to replace all the treads and risers. So that means MORE DEMO! Yay! So we then stripped the stairs down to the stingers and go to work replacing all the pieces we took out.
{ Sparkie working on the master plan }
While everything was torn out, this was the perfect time to work on the space under the stairs that would be my new puppy room! Turns out all the walls were completely open to the crawl space underneath, so we had to insulate and sheetrock everything in. A little cheat method. . . I used my handy dandy staple gun to secure the insulation to the framing members. . . . since there was no sheet rock on the other side to hold it in place.
{ My tiny paws come in handy working in small spaces }
After we had it all sheetrock and the walls finished, it was time to focus on the flooring. We needed something easy to clean because I am not the biggest neat freak and some of my furbaby friends I have over can be quite the mess makers. Inexpensive peel & stick tile was the key. So easy to install and gives my room a nice finished look!
Once the inside was finished, it was time to focus on the actual stair parts. The risers were easy and made of simple flat boards. The treads were a little more difficult, but the ticket is buying prefab stair treads with rounded edges.
Also remember that when dealing with hardwood floors, you need to make sure the new wood matches the species of wood in the rest of the house so the stain has the best chances of matching. When matching stain, I would suggest a few test samples from the store first until you find the right one.
{ Starting to take shape }
I have been told building stairs is the hardest part in the home. . . but I handled it like a “BOSS”ton and quickly found out that really the hardest part is trimming out the stairs. Quite a feat, but we handled it and I think they get the Paw-seal of approval.
{ All trimmed out }
Lastly we needed to frame up a Boston size opening. Really, we needed one also big enough for my mom to climb in as well and help me clean from time to time. Now we just needed some final touches. In comes the barn inspired gate. It is simply made of 2x4s and colored with my moms favorite finishing material: the ever-amazing tinted glaze. I thought it gave the perfect shade of gray.
{ Barn Gate = Rustic Touch }
Next detail is the rod iron railing my mom had custom ordered. The raw finish gave the perfect color and it really opens up the room!!
{ Custom built from Weldon Welding }
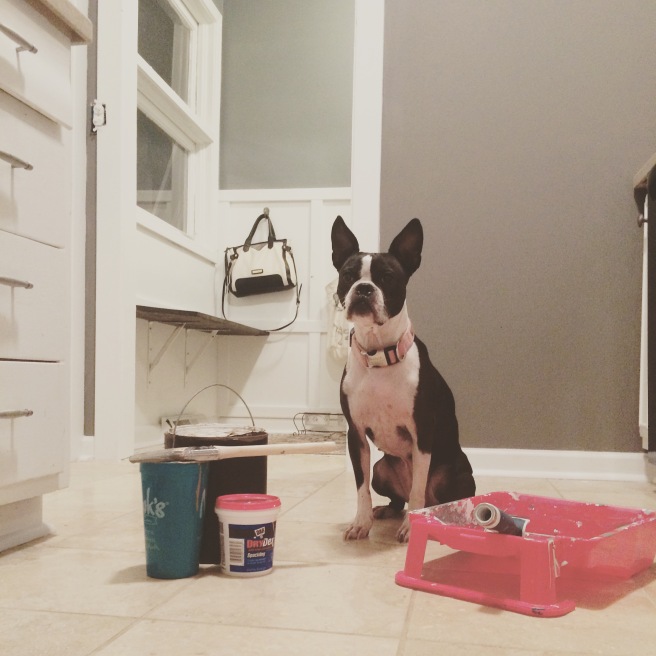
Lastly we finished everything with our new paint colors! That green was just not working for me.
{ The beautiful end result }
I absolutely love my new room and as you can see, so did Sparkie and all the friends we like to have over!
{ Boston Tea Party Room }
Not to mention it also provides the perfect spot for Christmas decorations!!!!
{ Home Sweet Christmas }
Hope you enjoyed and are now inspired to create your own perfect Pup room!
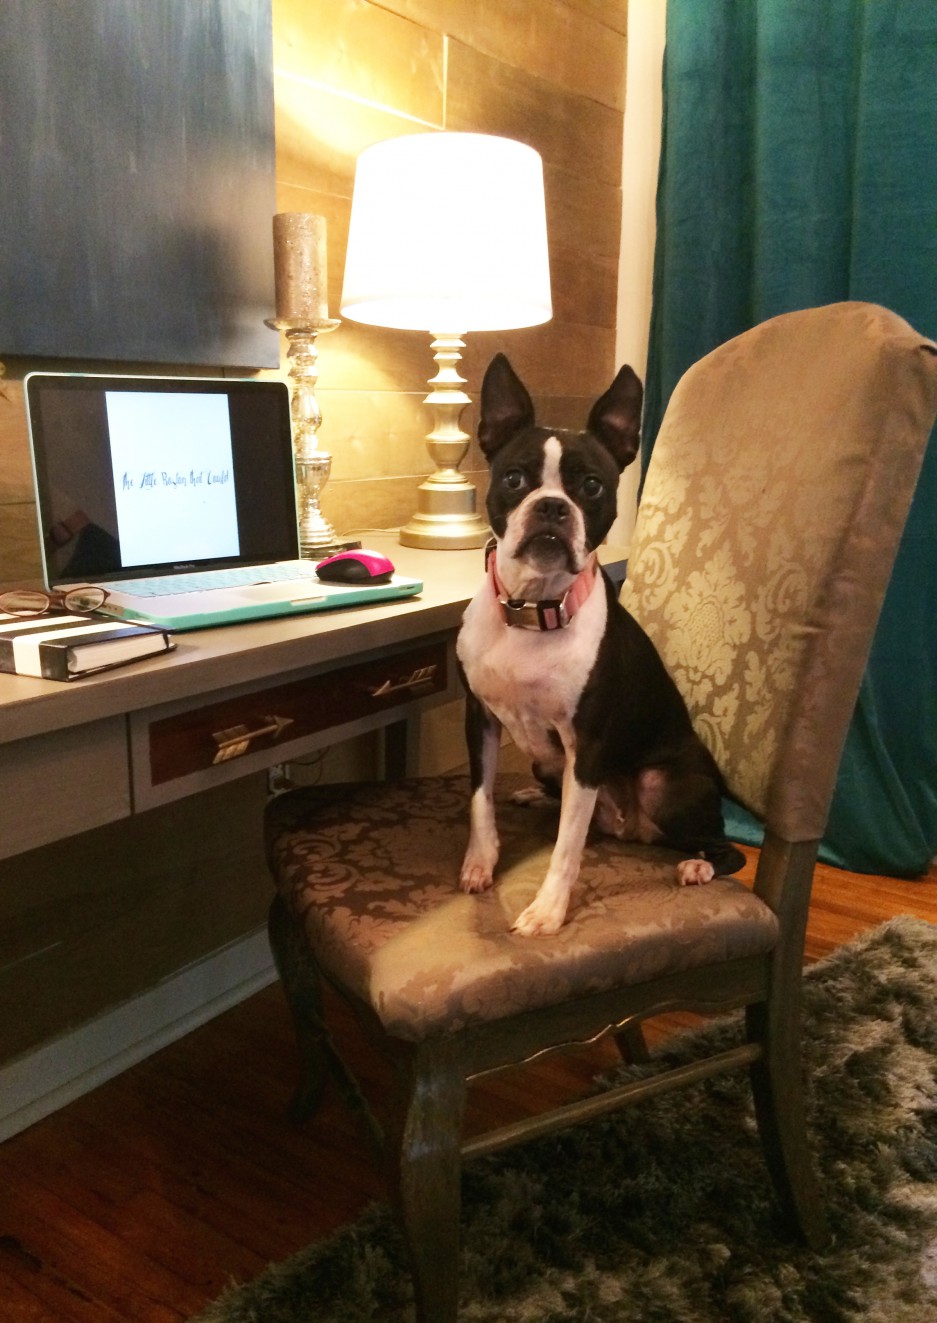
Saige here giving you a little insight into the life I live with my mom as we are remodeling our house DIY style. That means we are usually “Under Construction”. The moment I get a room all pulled together again, she is right behind me tearing something else up for her next project. She is worse at getting distracted than me with a squirrel.
Currently we are officially “Under Construction” in the Kitchen/ Laundry.
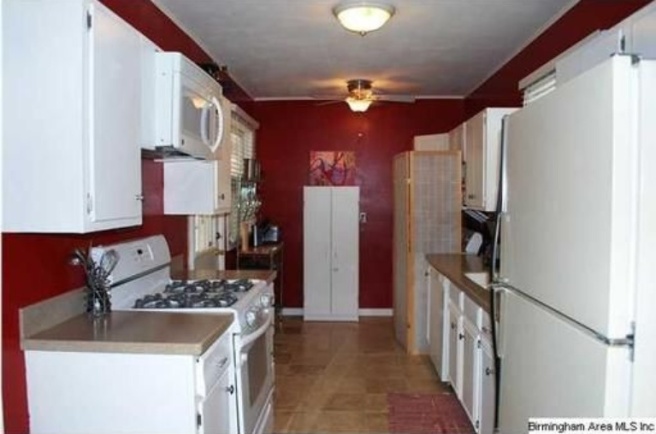
Does this drill make me look legit?You can see in the before photo of why this house was overlooked by potential buyers. . . you could cook your meals and wash a dog bed at the same time.
Before. . .
Convenient yes, but not an attractive looking feature. . . having your laundry on display in your kitchen. Our real estate agent stated that most people discounted this little gem of a fixer upper because of this easy fix. Not mom and I though, we knew a little bit of sheetroock and of course paint (ol red HAD to go!) could fix this problem!
So here was the plan: most price effective option was to simply add a wall. The spacing between the laundry & kitchen was perfect and the washer and dryer hook ups were already in this location. Construction budget tip: The more plumbing and electrical you can leave in the original position = the more cost effective.
Step 1: Build a wall. 2x4s went in and the framing began
Instant laundry room 2×4 LayoutNow I did frame up my own doggie room that my mom wanted to add under the stairs, but we were far from experts on this subject. So we welcomed some outside help on this part. Luckily my mom has a dad and grandfather, who got her hooked on all this home renovation stuff, that are willing to show up and teach us even more!
Checking my dimensionsWe even learned a very simple fact. We already knew a carpenters rule of thumb: Studs (2×4 framing) are to be placed every 16 inches, but we were clueless to this little trick: Tape measures usually highlight this dimension in red for convenience.
Don’t forget to leave a spot for the door. I of course had to have a barn door, so there will be a whole entire other post on that! But little side tip: When building small spaces, make sure you have a doorway wide enough to get what you need in and out. In this case: washer, dryer, and linen cabinet. Easiest way is to have them in the room first, before the walls get tight, but that’s not always an option. And you do have to think ahead for if and when they might need to be taken back out.
Step 2: Insulate
This will help reduce the noise from the washer and dryer, and now we can pretend they aren’t even there.
Do you think my dog fur would be good insulation??Step 3: Sheet rock!
My mom and I have learned quite a bit on this step since buying this fixer upper.
Starting to take shape!But do make sure you buy sheets tall enough to cover your height of the wall. Less cuts and aggregation. Unlike you are like us who thought “Yeah 8 ft sheets will be perfect”. . . They run a little short on an 8′-6″ high wall. Thats ok, because we’re used to being vertically challenged so we forged on. . .
Details on the Layout:
Getting efficient up in hereWe wanted to keep the washer and dryer on the wall where the current hook ups are, so that was an easy decision that determined the layout. Next we needed more storage. Mom scored this awesome linen cabinet for FREE from work. . . so we had to make it fit! With all that considered, and the tiny space we had to work with. . . the only solution was to stack the washer and dryer.
Easy solution: Dryer stacking kit my mom just bought on amazon.
Stack it up
Make sure you research the kit for your model and brand. Or if you’re like me and scored a heck of a deal on a washer and dryer from separate brands. . . a little retrofitting of where the screw holes go will need to be done. . . but nothing a little Boston can’t handle. So in this case mom made sure she bought the kit that matched the dryer and we just adjusted it on the washer. These washer/dryer vibration pads are also a good investment!
So as you can see we have a little further to go as it usually happens in DIY world. Using your own 4 paws and free labor will save A LOT! But it usually does not go as fast as hiring a pro. But I promise the satisfaction is worth it. So stay tuned so you can see the smile on my little doggie face as we wrap this puppy up.
Bathrooms are small rooms but they can make a big impact! They can also cost quite a bit to renovate. So until you’re ready to do a serious upgrade there are many steps you can take to give your bathrooms a face lift.
Check our out guest bath before we moved in. . .
Before. . . ummm wow!
It was definitely making an impact, just not the one we wanted. I was embarrassed to have any of my friends set a paw in here!
The joys and aggravations of renovating a home is there is SOOO much to do and after all I am only one little boston. So we had to pick and choose what we take on first.
We of course have an overhaul plan to make this room really shine in the end:
Brand New vanity with fancy hardware || 2. Spraying tile white {cost effective alternative to laying new tile and lasts 5 years} || 3. Classy new mirror {the bigger the better to make the space look larger} || 4. Sconces on either side {to really dress it up instead of the same old overhead lights}
But until we are ready to commit to a full bathroom overhaul. . . here are some tips on how we “fluff” it up Boston Style without all the major renovations.
Scrumptious Blue-Gray
1. PAINT!!! A fresh coat of paint always dresses up anything. If you are having to work with an outdated tile, don’t fight it, try to pick a color that will compliment it as well. Not always the easiest task, but still worth the effort
{ I love how cozy it is on my paws }
2. Textiles: The perfect way to dress up a bathroom especially with all of the options out there. . . Rugs, Towels, Shower curtains. So many choices! I wish they had this many options in doggy beds! The trick with these is using a neutral color scheme so that it won’t fight against intense tile colors as well. As far as the rugs. . . the BIGGER to better to cover up that colorful floor!
3. Details: Photos & flowers can really dress a small space up. It also helps to distract from the dated fixtures.
{ Strike a pose }
4. Throw them for a loop: The last layer is adding in something out of the ordinary that would not usually belong in the bathroom. In this case: the rustic ladder towel rack or the sleek lanterns. This makes the space feel more at home and customized without breaking the bank or even busting out any tile.
The powder room and guest bath is also a great place to add a little punch because it is unexpected and closed off from the rest of the house so it’s easy to make it unique. Check out some of these I’ve been drooling over online. They certainly get the Boston “Paw” of approval.
{ Check out this “Bow-WOW” factor }{ Looks yummier than my puppy treats }{ LUUVVVIN this pupplicious wallpaper }
This one even from my Mom’s company at Twin Construction because it’s soo yummy.
{ Wish mom would’ve brought this one home || Designer cred to the talented Laurie Fulkerson }


 already knew a carpenters rule of thumb: Studs (2×4 framing) are to be placed every 16 inches, but we were clueless to this little trick: Tape measures usually highlight this dimension in red for convenience.


 scored a heck of a deal on a washer and dryer from separate brands. . . a little retrofitting of where the screw holes go will need to be done. . . but nothing a little Boston can’t handle. So in this case mom made sure she bought the kit that matched the dryer and we just adjusted it on the washer. These washer/dryer vibration pads are also a good investment!


 { Strike a pose }


